Umami offers a user-friendly and privacy-focused alternative to the ubiquitous Google Analytics. As an open-source web analytics tool, it provides you with necessary insights about your website's traffic without compromising the privacy of your visitors. In this guide, we will walk you through the process of setting up Umami for your blog using PlanetScale, GitHub, and Vercel.
Step 1: Create an Umami Database on PlanetScale
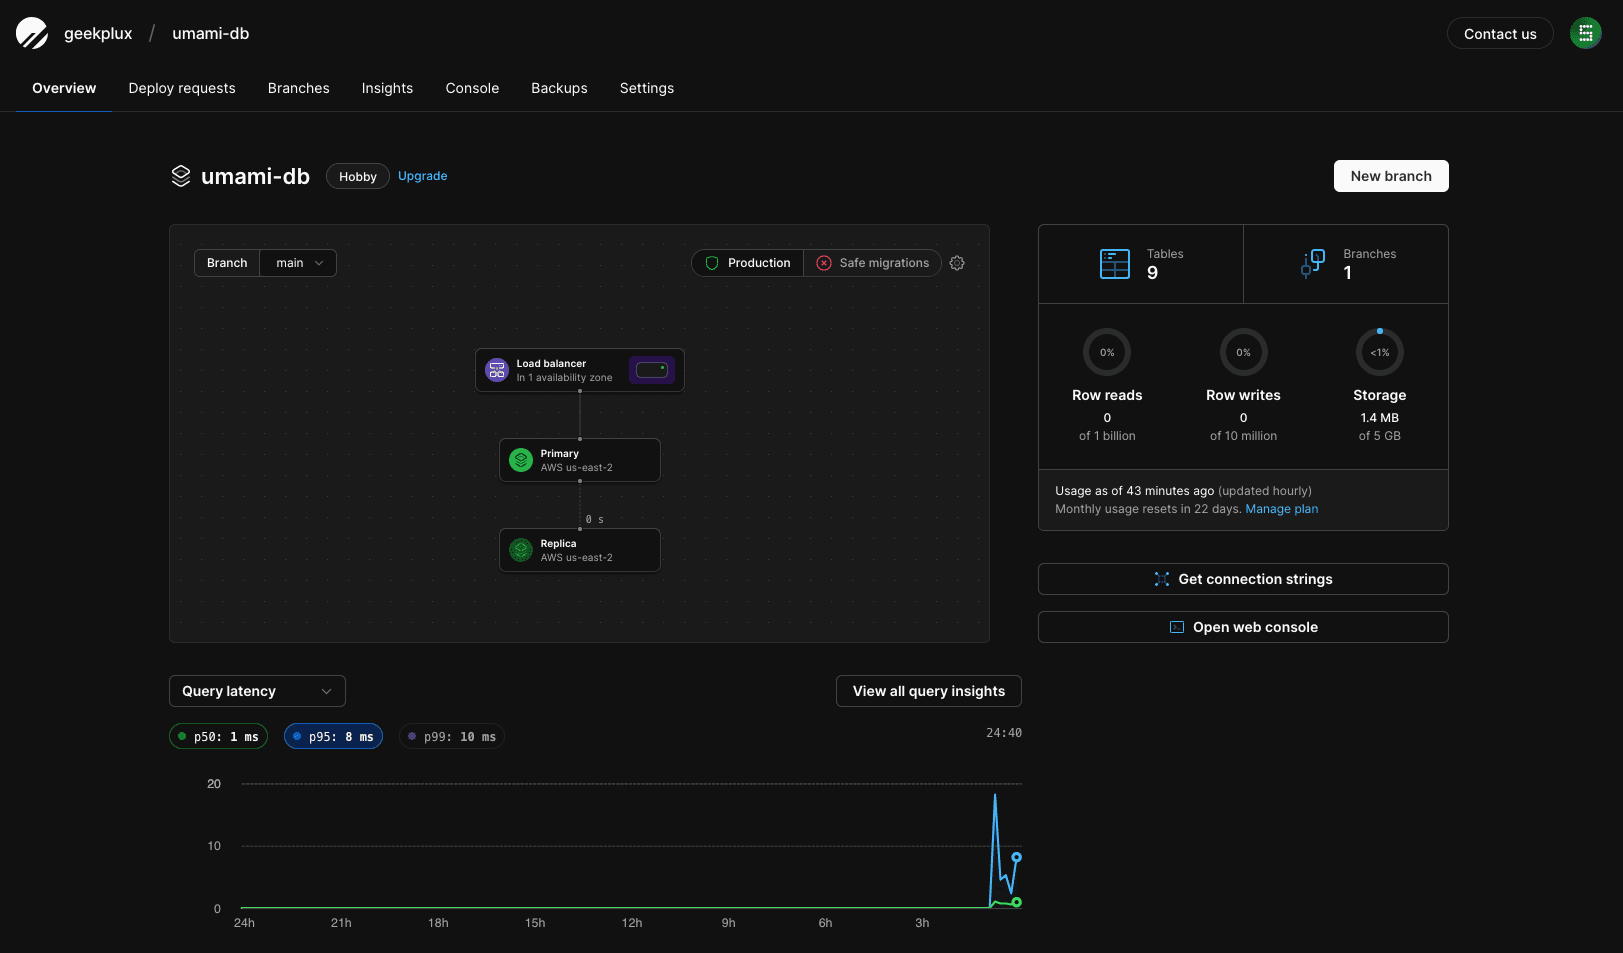
Before you start, you need to create an Umami database on PlanetScale (opens in a new tab). This will store your site's analytics data that Umami will collect.
- Navigate to the PlanetScale dashboard.
- Click on the 'Create Database' button and name it 'umami-db'.
The creation process may take a few moments. Upon completion, you will be able to see your new 'umami-db' listed on your PlanetScale dashboard.

Step 2: Fork the Umami Project on GitHub
Next, we will clone the Umami project to our own GitHub account.
- Go to the Umami project on GitHub (opens in a new tab).
- Click the 'Fork' button located at the top right corner of the page.
The Umami project will now be copied into your GitHub account.
Step 3: Import Your Umami Project on Vercel
Vercel will be used to deploy our Umami analytics.
- Head over to your Vercel dashboard.
- Choose 'Import Project' and select the Umami project from your GitHub repositories.
Vercel will automatically start deploying the project.
Step 4: Configure PlanetScale Integration to Vercel
We will now integrate the 'umami-db' database with our Umami project on Vercel.
- Return to your PlanetScale dashboard.
- Navigate to the 'Integrations' section and select 'Vercel' as your choice.
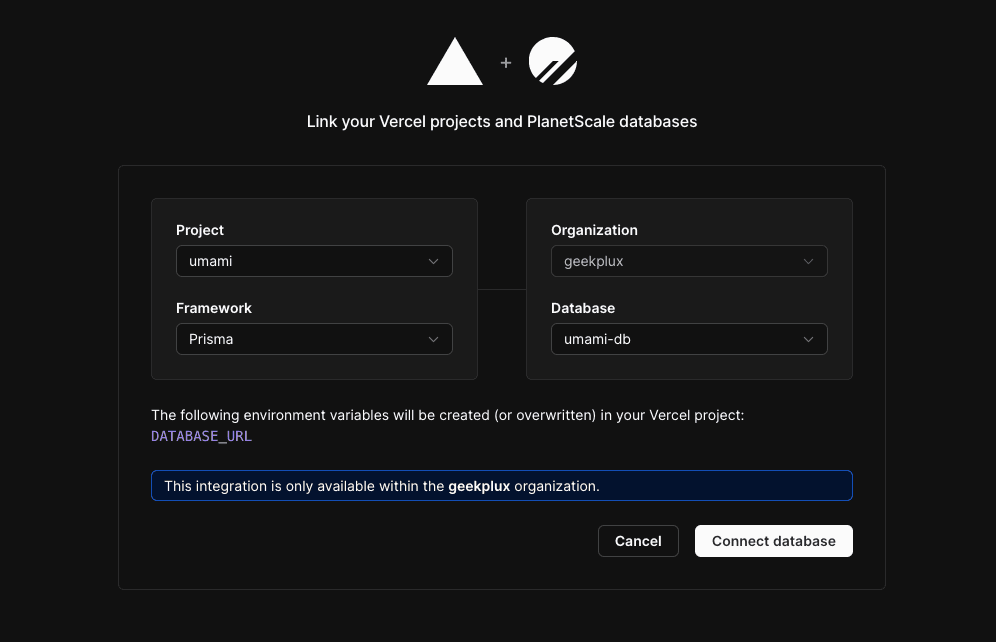
- Connect your 'umami' project with your 'umami-db' database.
- Choose 'Prisma' as the connection method.
This process will automatically fill in the 'DATABASE_URL' environment variable in your Vercel project.

Step 5: Redeploy Umami on Vercel
With the database connected, we now need to redeploy our Umami project on Vercel.
- Go back to your Vercel dashboard.
- Navigate to your Umami project and click 'Redeploy'.
The deployment process will begin. After completion, you will be able to see the new deployment in your Vercel project dashboard.
Step 6: Configure Umami to Track Your Website
Finally, we will add our blog to Umami to start tracking.
- Head over to your deployed Umami dashboard.
- Click 'Add Website' and fill in the details of your blog.
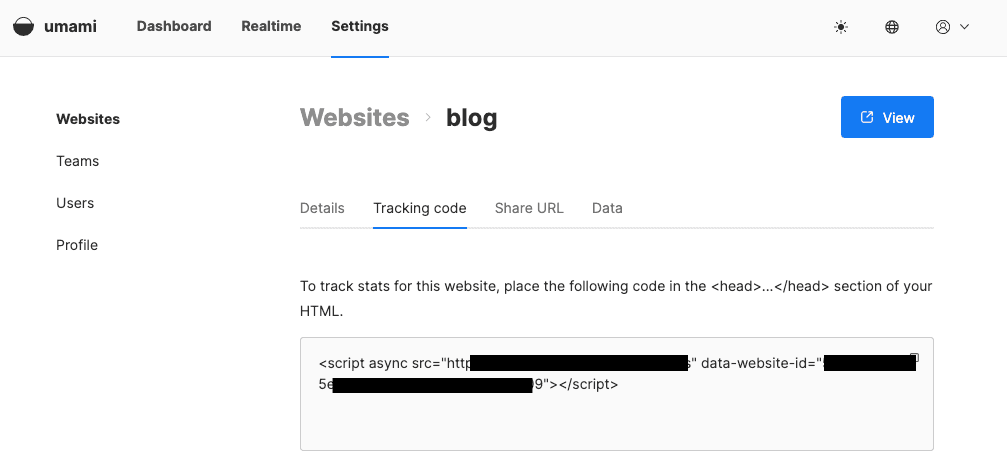
- Copy the generated tracking code.
- Paste this tracking code into the HTML of your blog.

Congratulations, you've successfully set up Umami for your blog! Now, your website's performance and visitor behavior can be monitored right from your Umami dashboard.
However, if you'd rather not host this service yourself, consider purchasing services from alternatives such as Plausible (opens in a new tab) or Fathom (opens in a new tab). These options offer excellent analytics capabilities without the need for self-hosting.
This whole process is surprisingly simple and only requires a few clicks of your mouse. Enjoy your newfound analytical power with Umami or its excellent alternatives!