
As of 2013’s PS4, Sony has included dedicated capture buttons on its DualShock/Dual Sense controllers to aid with saving your best clips and screenshots whenever you want. The PS5 has the same feature, which is great whether you’re a content creator or just want to archive your gaming history. If you’re looking to set up a simple and reliable way to capture clean video and screenshots of your favorite games, this guide will break it all down for you.
Note that while this guide may reference streaming (referred to as “Broadcasts” in the PS5’s operating system), we won’t be focusing on that aspect of capturing. This guide is best suited for archival purposes and non-streamed content creation and for capturing footage using the PS5’s internal capture settings, so it may not be suitable for use with an external capture card.
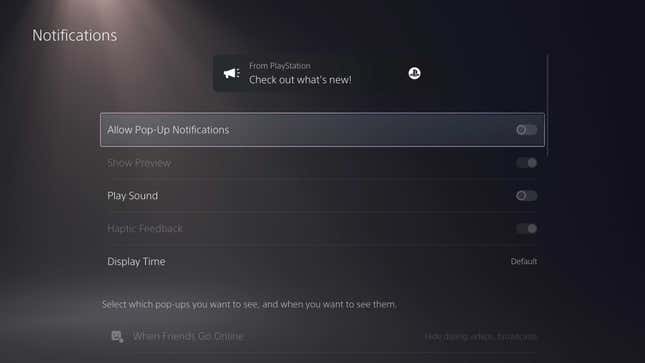
Before we even touch any video or screenshot setting, we need to make sure our footage will be free of any unwanted banners or sounds from a notification. Depending on how much you rely on notifications, you may want to tailor these settings. Ultimately the best setup for reliable, undisturbed capture is to turn as many of them off as possible.
Select the gear icon on your PS5’s home screen and navigate Notifications. We recommend turning off “Allow Pop-Up Notifications” and “Play Sound,” but be aware:This is a nuclear option that’ll keep your PS5 from notifying you about anything. This includes notifications about friends signing on, messaging you, sending you friend requests, etc.
If you leave “Allow Pop-Up Notifications” on, you can toggle which notifications you want to see and at what point. Keep in mind: The more notifications you have turned on, the more likely it is you’ll potentially end up with an unwanted notification pop up in a screenshot or video.
Select the gear icon on the home screen of your PS5 and navigate to Captures and Broadcasts. Under Captures, select “Screenshot Format” and change the setting from JPG to PNG. Note that this will result in larger screenshots. The tradeoff, however, is that they are higher quality and you can always change a PNG to a JPG with image editing software on a computer.
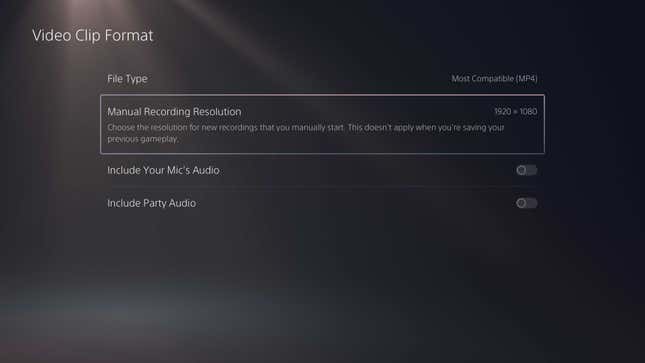
Once you’ve changed your screenshot settings, select “Video Clip Format” and change the file type to “MP4” instead of WebM. Like with the PNGs, this will result in larger files, but the compatibility and quality will be worth it. Additionally, you can select between 1920 x 1080 resolution and 3840 x 2160. Note that the latter will only work with WebM videos. On this same screen, you should turn off “Include Your Mic’s Audio” and “Include Party’s Audio.”
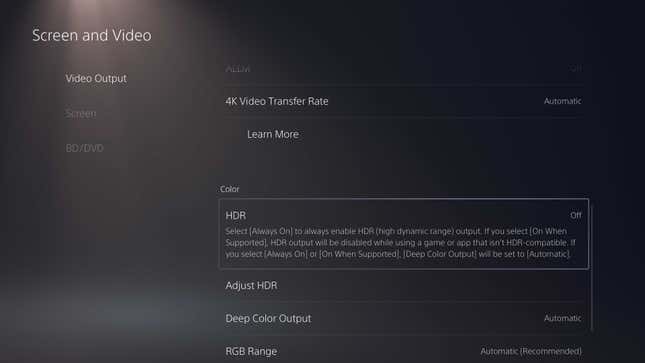
HDR, or High Dynamic Range, sure looks pretty, but it can result in washed-out capture. While you may enjoy having this feature turned on while gaming with a TV that supports HDR, you should get into the habit of turning it off while grabbing video or screenshots.
In the Settings menu, navigate to “Screen and Video,” scroll down to HDR and turn it off.
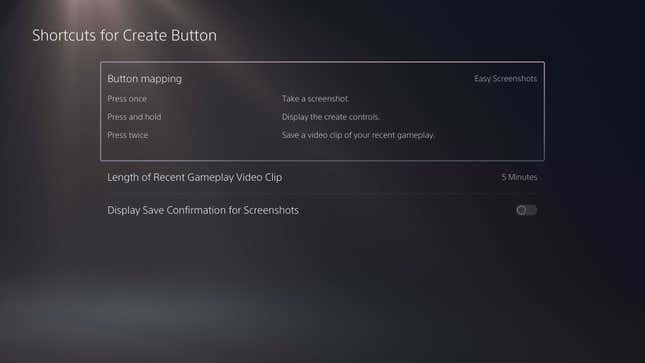
The “Create” button just to the left of the touchpad is how you’ll enable capture or grab screenshots. You can set three different commands, one for pressing the button once, another for holding it, and yet another for pressing it twice.
We here at Kotaku recommend the “Easy Screenshots” settings for the following reasons:
- A simple tap of the Create button results in a quick screenshot, ideal for capturing multiple shots during a cutscene or for grabbing a speedy screenshot of hectic gameplay
- Holding the create button lets you choose specifically whether you wish to enable manual recording (up to an hour of footage at a time), grab a screenshot, or save recent gameplay
- Pressing twice lets you save a recent clip as its own file (perfect for creating a separate video file of a unique moment)
You may set the length of the recent gameplay clip to your needs, anywhere from 15 seconds to an hour. We recommend setting this to around 15 minutes or fewer, as manually recording by holding down the Create button and selecting record will let you record up to an hour of video anyway.
To record video clips up to an hour in length, simply hold down the Create button and select “Start New Recording.” We recommend wrapping these recordings up around the 50 minute mark (you can see the current length of the clip you’re recording by holding down the Create button) as a non-avoidable indicator will appear in the center top of your screen once you cross over the 55:00 minute mark during capture.
Finally, and perhaps most importantly, be sure to turn off “Display Save Confirmation for Screenshots.” This will prevent an icon from popping up every time you take a screenshot. If left on, rapid screenshots might result in this upper right-hand notification appearing in your screenshot, which is not ideal for perfect capture. You will still need to be wary of accidentally pressing the Create button too quickly as the notification for capturing recent gameplay still activates and can be seen in a screenshot, so space out your screenshot spamming.
If you’re recording with an external capture device, we recommend turning off the system sounds such as the shutter sound effect when snagging a screenshot. Navigate to “Sound” in the settings menu, select “Audio Output” and scroll down to “General.” Here you can turn off “Sound Effects.”
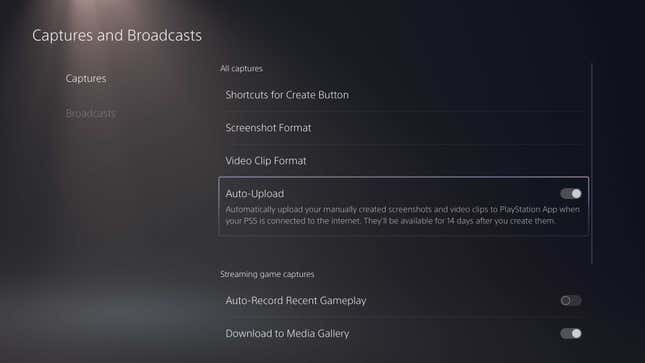
If you’re planning to export your captures frequently, you may also want to leave “Auto-Upload” on in the “Captures and Broadcasts” settings menu. Uploads will be available on the PlayStation App for 14 days at a time if you have this turned on.
Finally, you may wish to toggle the settings for “Auto-captures” at the bottom of the “Captures” area of the “Captures and Broadcasts” menu screen. When both “Trophies” and “Challenges” are turned on, your PS5 will automatically grab a screenshot and/or video of the moment you earned a Trophy or finished a Challenge. While this can be a nice feature, these screenshots and videos can add up over time, so turn these on or off at your discretion. Also, automatic Trophy screenshots feature a banner on them with info about the Trophy.
The PS5 is both an incredibly powerful game console and a fantastic capture device. These settings will enable you to store clean, high-resolution captures to document your gaming journey or create entertaining content.
